I’m sure you’ve dyed eggs or colored festive pictures of bunnies and flowers. But there are so many fun-filled Easter crafts you can make to celebrate the holiday.
Some are cute and cuddly, others are elegant and decorative. But one thing’s for sure. Each craft will get you ready for the Easter season and each one is great for kids and adults alike!
Related: DIY Spring Burlap Decor
I’m sure there are dozens of ideas out there… but I found a few Easter crafts I think you’ll love. Read on to see what I picked out for you!
Fun and Decorative Easter Crafts
Spring has sprung and Easter is right around the corner! Here are some crafts that are simple, fun and bound to bring out your creative side.
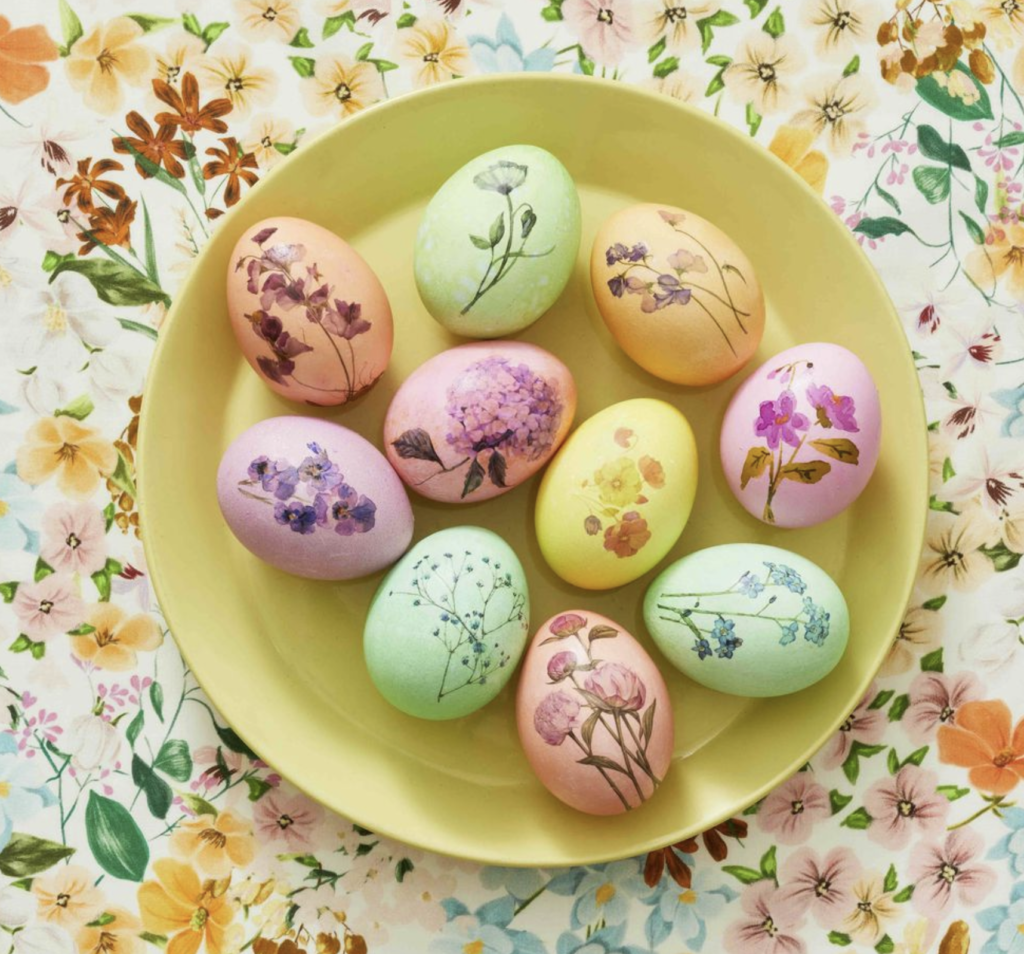
Temporary Tattoo Easter Eggs
Here’s a new take on dying easter eggs. And they’re surprisingly easy to make!
What you’ll need:
- Hard-boiled eggs or blown eggs
- Water, food coloring and vinegar
- Temporary tattoos
- A damp foam brush or sponge
To make them, mix about 1/2 cup boiling water with 1 teaspoon of vinegar and 10-20 drops of food coloring. You can make multiple colors in different cups.
Then, dip each egg in the dye for about 5 minutes. When the eggs are colored, remove the eggs from the coloring and lay them out to dry completely.
Next, cut each tattoo out of the sheet, and just as you would on skin, place the tattoo design-side down on the egg. Wet the back of the tattoo with the sponge/brush and hold it down for a few seconds.
Peel the back of the tattoo off to reveal a beautiful design!
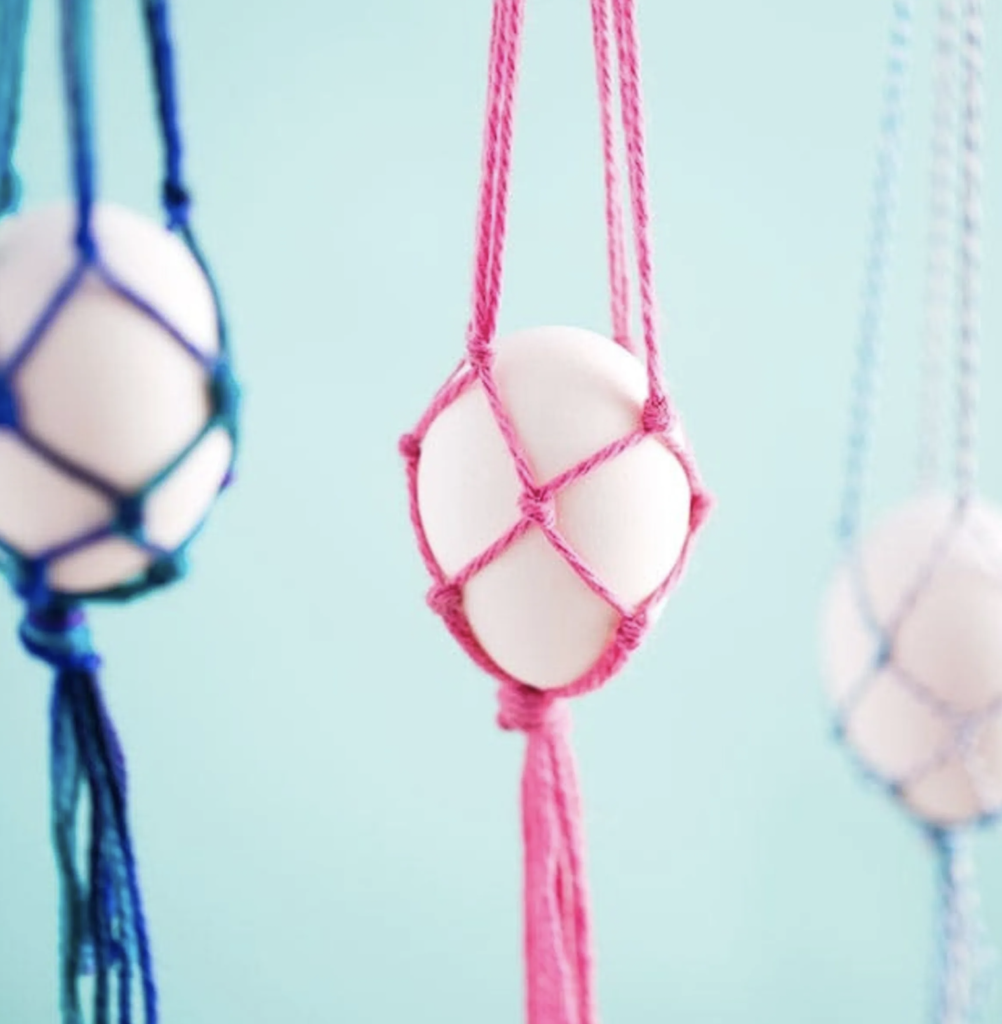
Macramé Egg Holder
Aren’t these little egg holders the cutest?
You can hang them outside on your porch, inside by a window or anywhere where you’d like some festive Easter decor!
What you’ll need:
- Hard-boiled eggs or blown eggs
- Yarn
The twists and ties of these holders may seem complicated, but making them is actually pretty simple. You can find a full tutorial (with images) HERE.
If you do end up making these macramé holders, let me know how you display them!
DIY Easter Egg Balloons
This craft is very kid-friendly. Because what kiddo doesn’t love balloons??
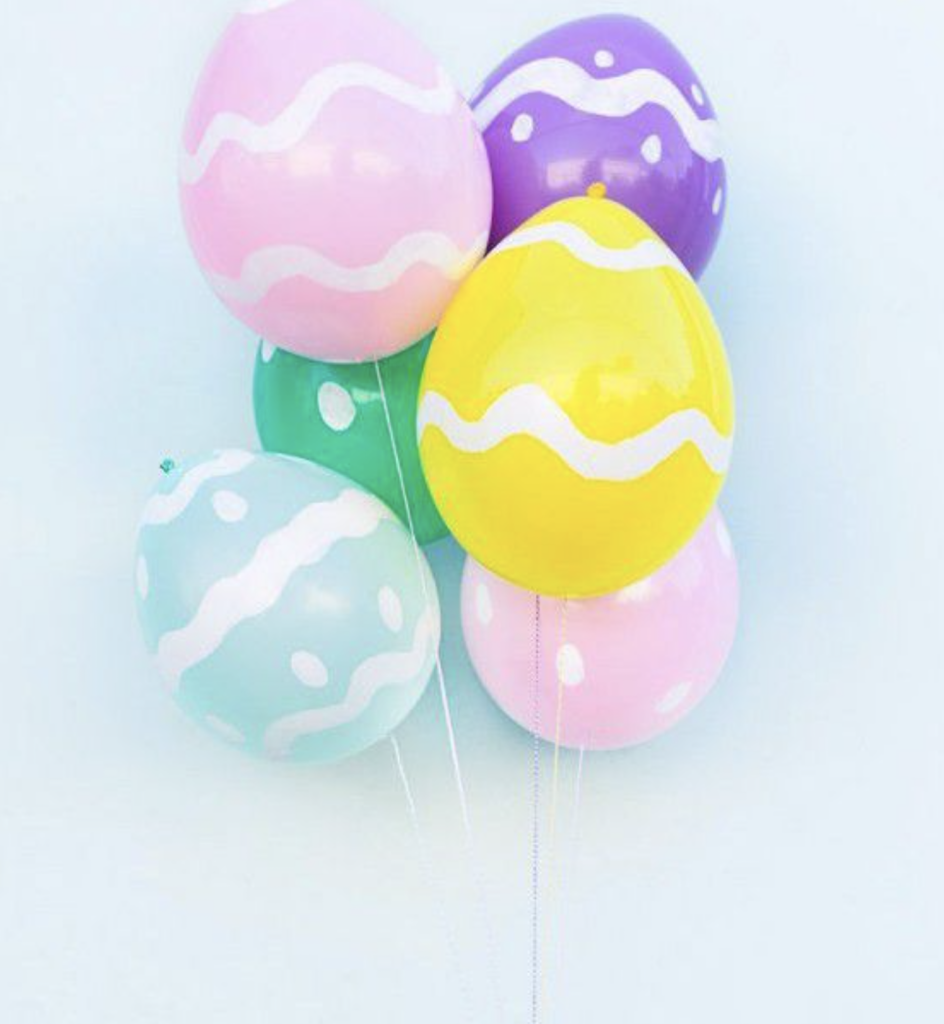
What you’ll need:
- Colorful balloons
- Paint pens or acrylic paint
- Paint brush (if using acrylic paint)
This crafty creator filled balloons with helium, but I love the idea of hanging them and simply filling them with air instead.
Beyond that, you can be as creative as you’d like with these balloon eggs! Set out your supplies, blow up and tie your balloons, and let the decorating begin.
But whether you use acrylic paint or paint pens, be sure to let them dry before handling them!
Bunny Craft Bags
These bags… how CUTE??
Not only are they super simple, but making them is extremely budget-friendly as well.

What you’ll need:
- Brown or colored paper bags
- Permanent marker
- Cotton balls or pom poms (optional)
As Easter approaches, send the kids to school with these adorable bunny bags. Or, use them as little goodie bags filled with treats and candy!
Cutting the bunny ears is pretty simple. Then, draw eyes, a nose and whiskers for the face! You’re welcome to add a little tail to the back — securing it with glue — and you can tie the top with string or a twist tie.
Egg Candleholders
Calling all my candle lovers! I hope you adore this craft as much as I do!
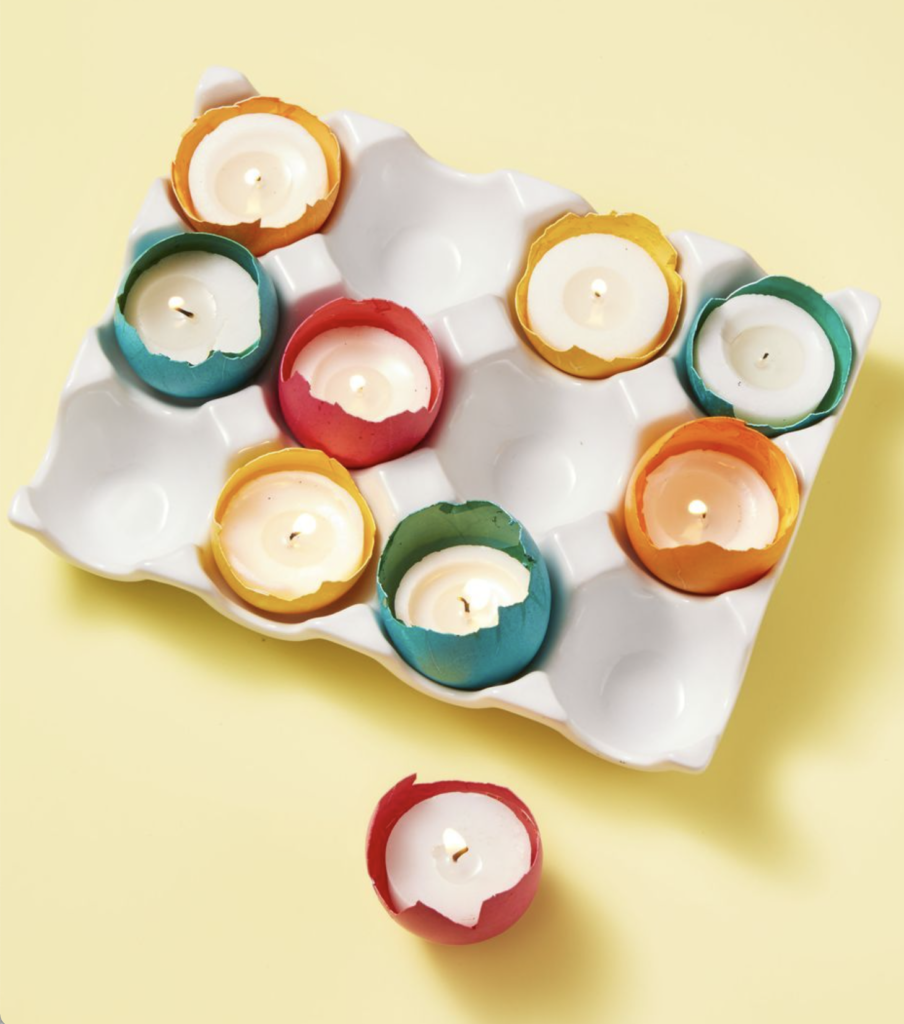
What you’ll need:
- Blown, dyed eggs
- Tealight candles
After you’ve had fun creating dyed Easter eggs, give them new life with these candles.
Simply place tealight candles in a cracked-open eggshell and display these colorful pops of color in your kitchen, on your table or anywhere you please!
Easter Egg Wreath
This Easter egg wreath requires a bit more time and effort. But by the looks of the result, it’s worth it!
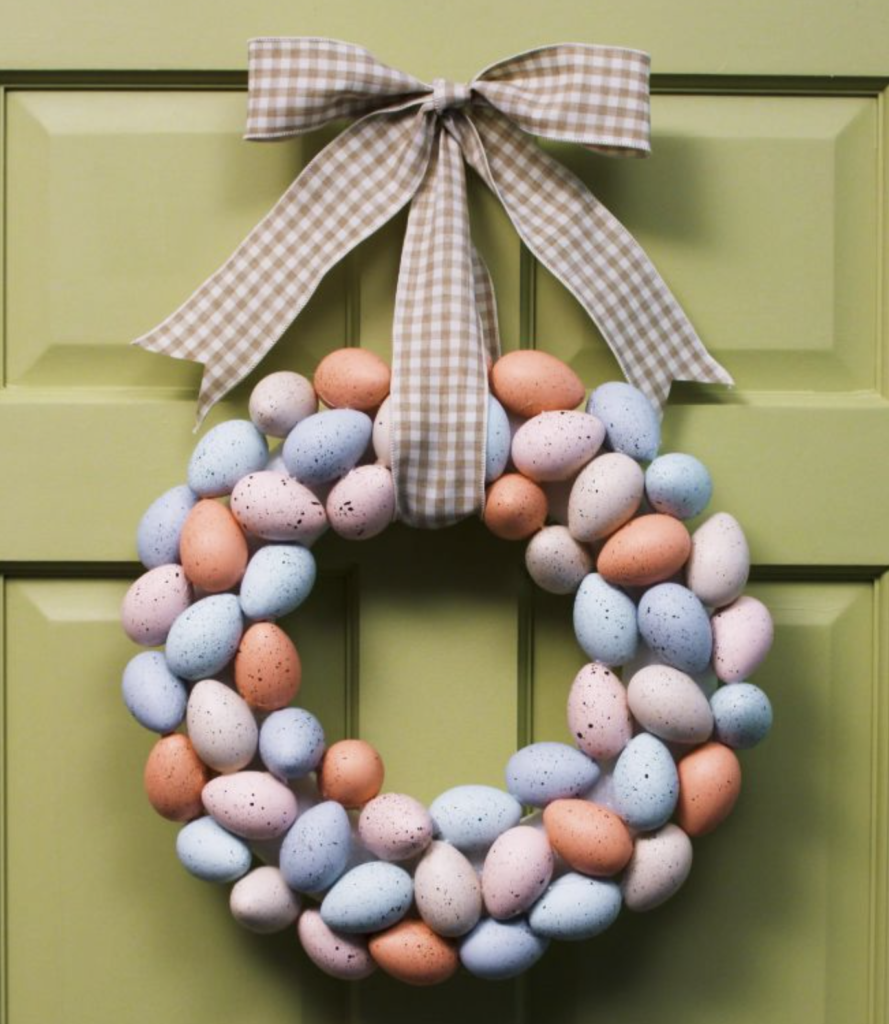
What you’ll need:
- Craft eggs (paintable)
- Foam wreath form
- Paint (in any colors you desire)
- Paint brushes
- Glue gun
- Ribbon
While it’s bound to take a little time and patience to complete this decorative craft, remember that you can use it year after year! Click HERE for the full tutorial.
Sweet Sock Bunnies
You can make these precious sock bunnies to place in a child’s Easter basket, or you can make them for yourself and display them around your home!
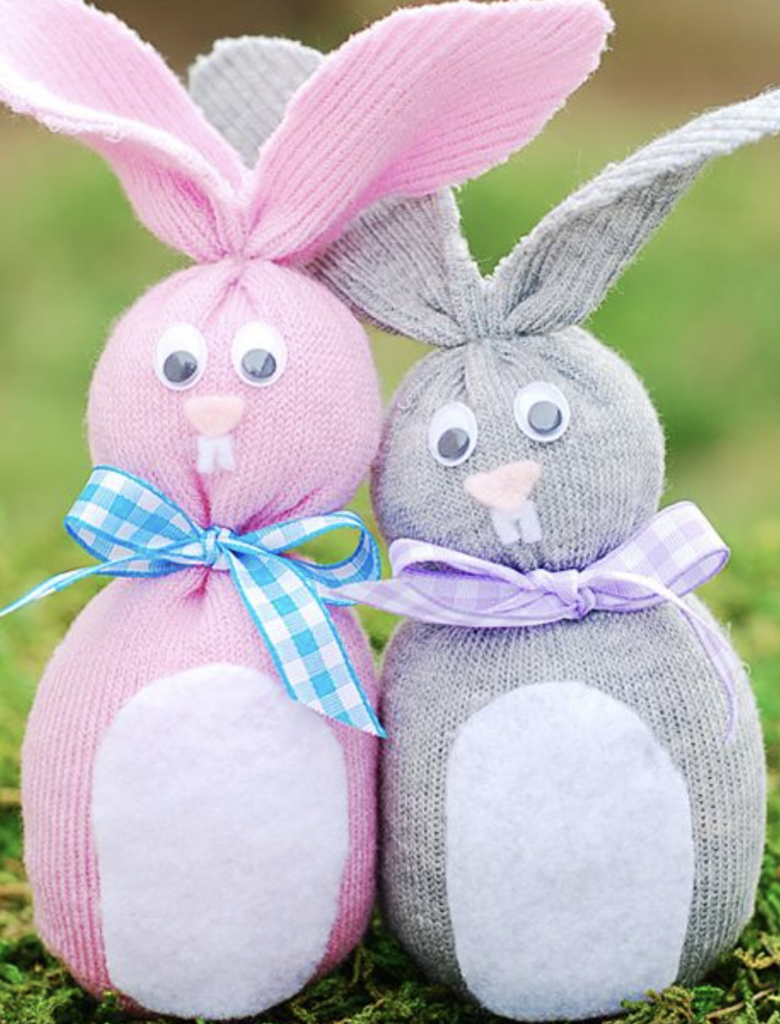
What you’ll need:
- Socks (high-rise are best)
- Felt
- Googly eyes
- Decorative ribbon
- Clear rubber bands
- Large pom pom
- Rice
Because these are filled with rice, you can set them in a special place without worrying about them falling over. (Although you may have to worry about them hopping away!)
They look fairly detailed, but you’ll be surprised at how easy they are to make! HERE is the full tutorial.
Egg Carton Daffodils
Call it a craft or DIY decor, these egg carton daffodils are elegant and perfect for spring.
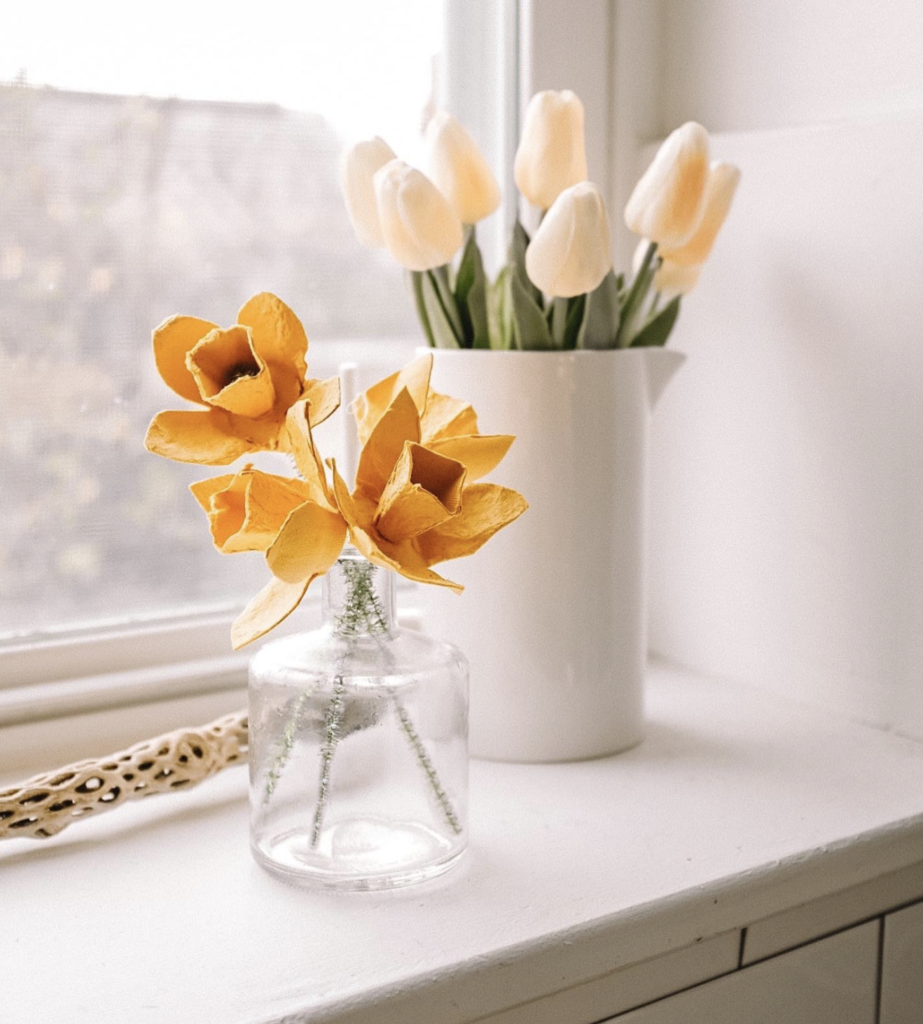
What you’ll need:
- Egg cartons (they sell colored ones that you might be able to find!)
- Pipe cleaners
They look elegant, but they don’t require a whole lot of time or effort. Click HERE to follow the steps to make these daffodils.
Mandarin Orange Bunnies
You know them as a tasty and refreshing treat. But with a few simple steps, you can turn them into adorable Easter bunnies!
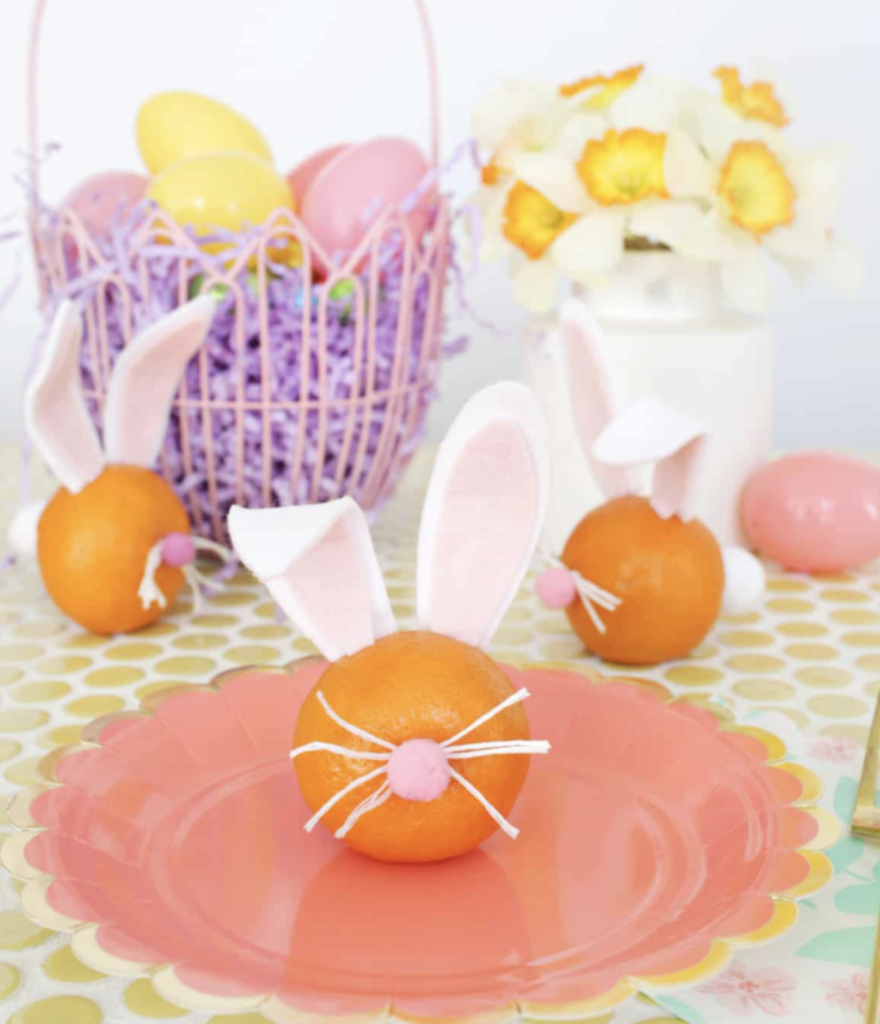
What you’ll need:
- Mandarins (or Clementines)
- Toothpicks
- Hot glue gun
- Small pink and white pom poms
- White embroidery thread
- Pink and white felt
- 3″ pieces of thin wire (optional)
I’m almost certain any child will go crazy for this craft. It may even get them to eat more fruit!
You’ll need to help with the cutting if safety is a concern, but they can certainly be a helping hand. You can find more information as to how to make them HERE.
Pipe Cleaner Easter Eggs
Oh, pipe cleaners. They were a staple in my childhood craft box!
And now, they may end up in my spring-filled home!
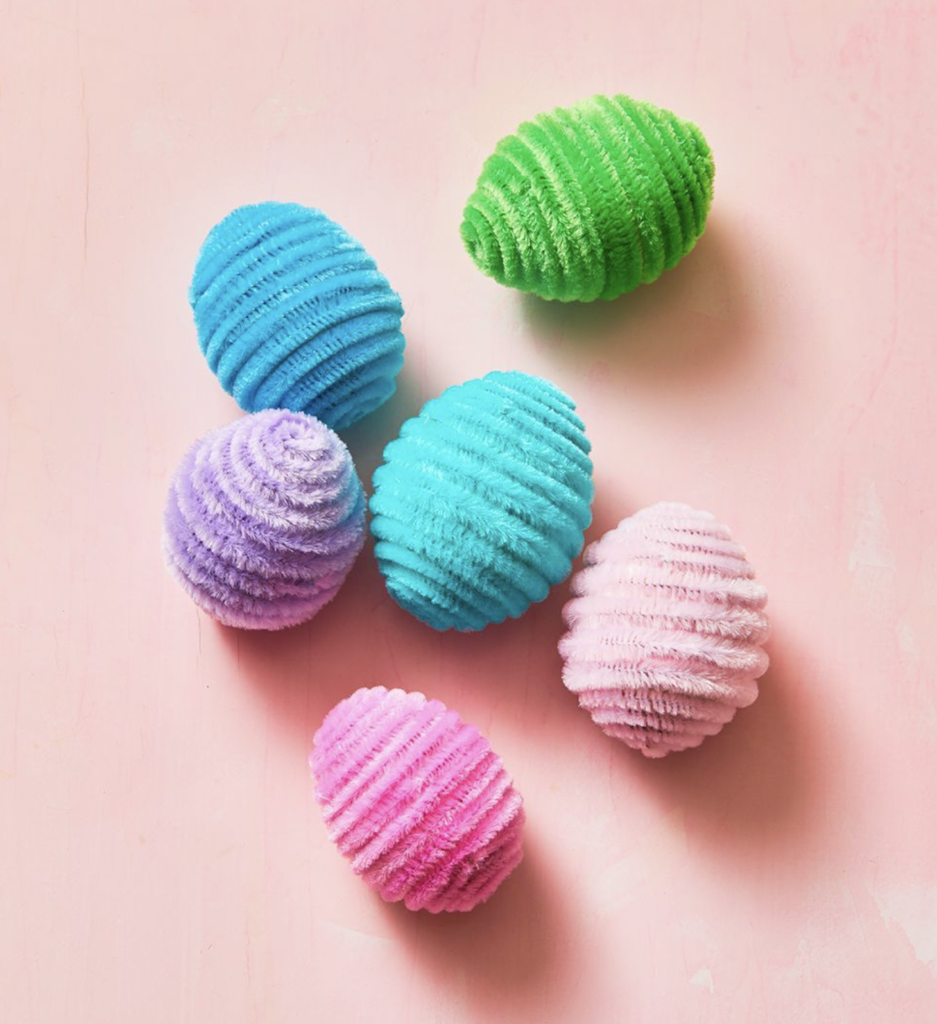
What you’ll need:
- Faux craft eggs or blown eggs
- Colorful pipe cleaners
- Hot glue gun
If you’re using blown eggs, make sure they’re completely empty and clean before getting started. If you’re using craft eggs, you’re good to go!
Next, attach one end of a pipe cleaner to the top of the center of the egg with a small dot of glue (it will take you 3-4 pipe cleaners to cover an entire egg). Carefully coil it around the egg, adding small glue dots as you go.
When you’re finished wrapping the egg, snip off any excess pipe cleaner and secure it with one last dot of glue at the bottom.
I don’t have a lot of time to craft. But with how cute all of these are, I may need to set aside some time to create a few. I hope you do too!
From my crafty home to yours,
Jill
Did you know I have my own online shop? Check it out HERE!
And. But. Plus. However. And. But. Plus. However. And. But. Plus. However. And. But. Plus. However. And. But. Plus. However. And. But. Plus. However. And. But. Plus. However. And. But. Plus. However. And. But. Plus. However. And. But. Plus. However. And. But. Plus. However. And. But. Plus. However. And. But. Plus. However. And. But. Plus. However. And. But. Plus. However. And. But. Plus. However. And. But. Plus. However. And. But. Plus. However. And. But. Plus. However. And. But. Plus. However. And. But. Plus. However. And. But. Plus. However. And. But. Plus. However. And. But. Plus. However. And. But. Plus. However. And. But. Plus. However. And. But. Plus. However. And. But. Plus. However. And. But. Plus. However.