I’ve always enjoyed carving pumpkins with my kids. Such fond memories of creating fun designs and jack-o-lanterns to put on our Halloween porch!
But the kids and I agree that the best part about carving pumpkins isn’t the carving itself… it’s salvaging the seeds and roasting them to make a tasty fall treat!
I’m sure you’ve made this savory snack too… but if you want to see how I make my seeds, I’ll give you a look!
(If you like the pumpkin dish, you can find it HERE!)
My Pumpkin Seed Process
If you’re picking out a pumpkin just for the seeds, it doesn’t matter what it looks like.
But if you want to do some carving after scooping out the insides, try to find one with a flat and clean-looking face!
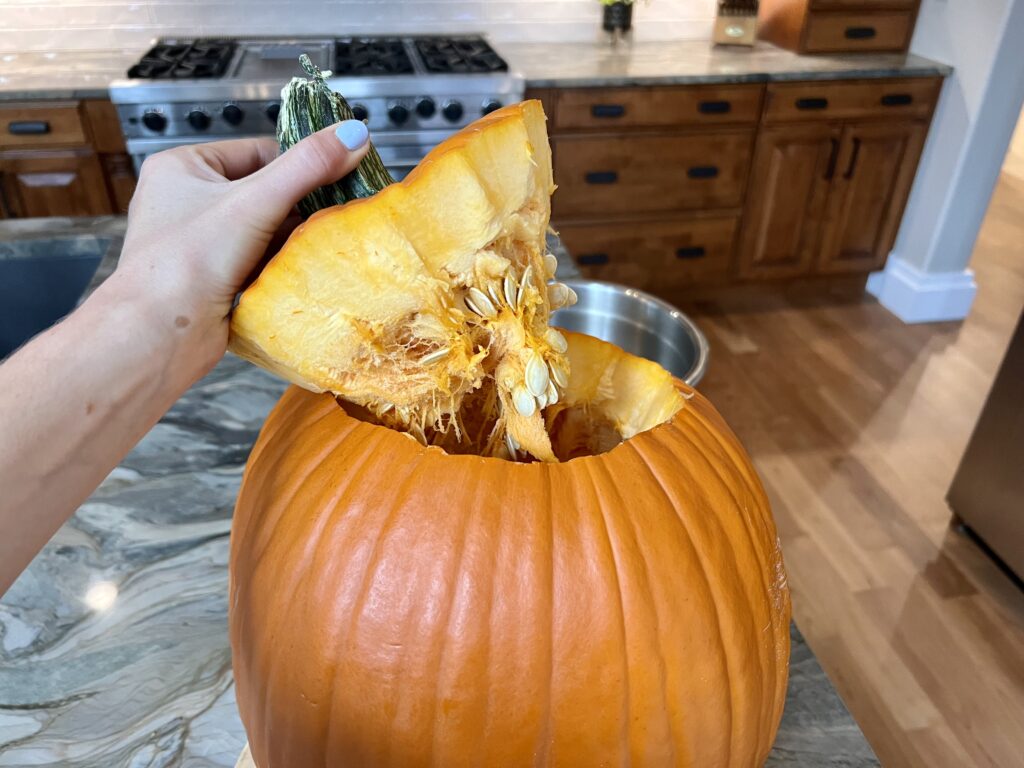
After picking the perfect pumpkin, use a large knife to cut around the top of the stem.
Remove the top to reveal the soon-to-be savory snack inside!
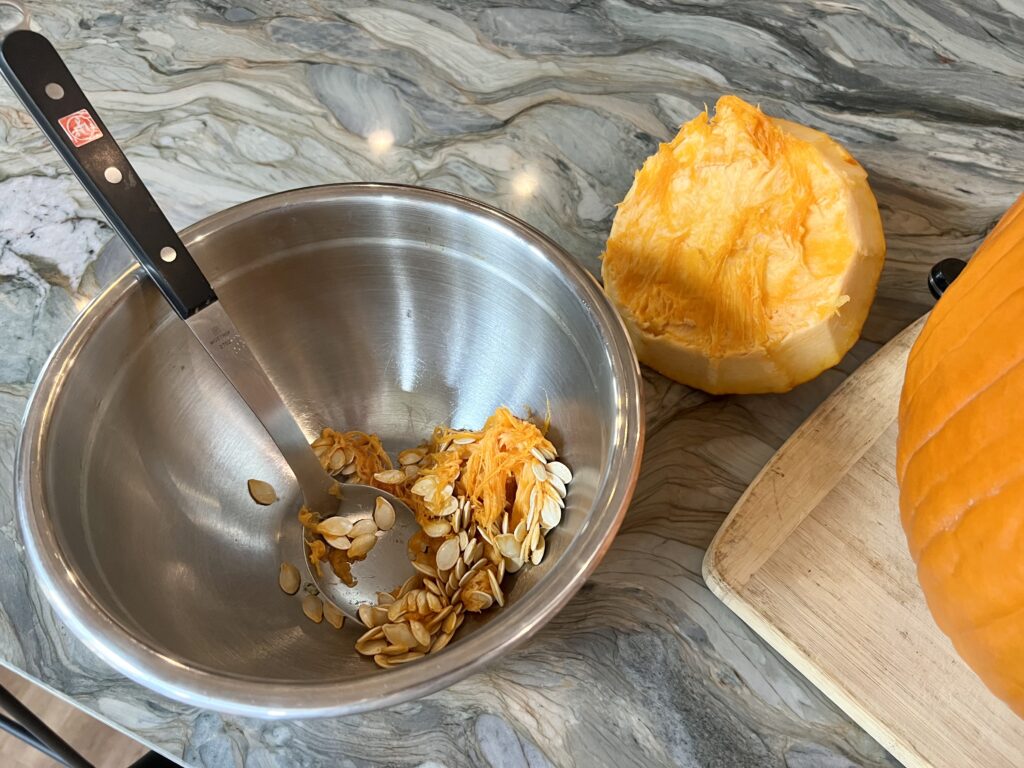
This part takes a little elbow grease. But you want to try to clean out your pumpkin as best as possible.
I like using a large spoon that has a long handle so I don’t get a bunch of “pumpkin guts” on my arm… however, you can use any spoon you’d like!
As long as you can get all of those seeds into a bowl, you’ll be good to go.
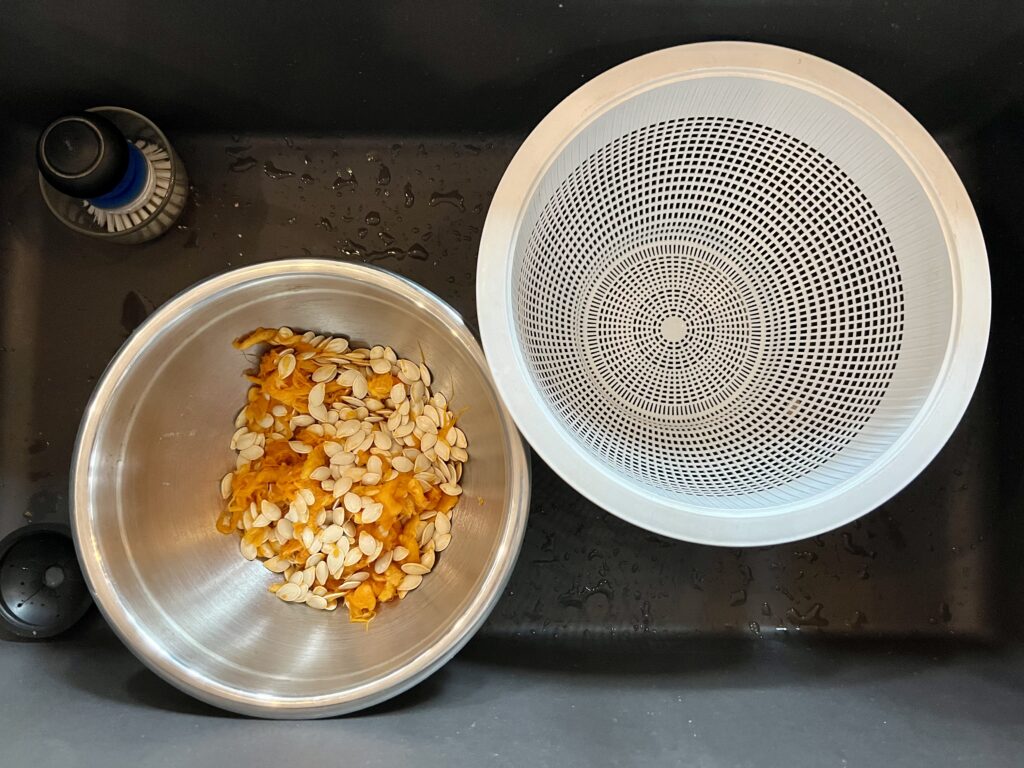
Next, transfer your seeds to a colander and while running water over them. Remove as much of those fibers and pulp as you can.
If you can’t get everything that’s okay too—you’ll just have some crispy pumpkin alongside your seeds!
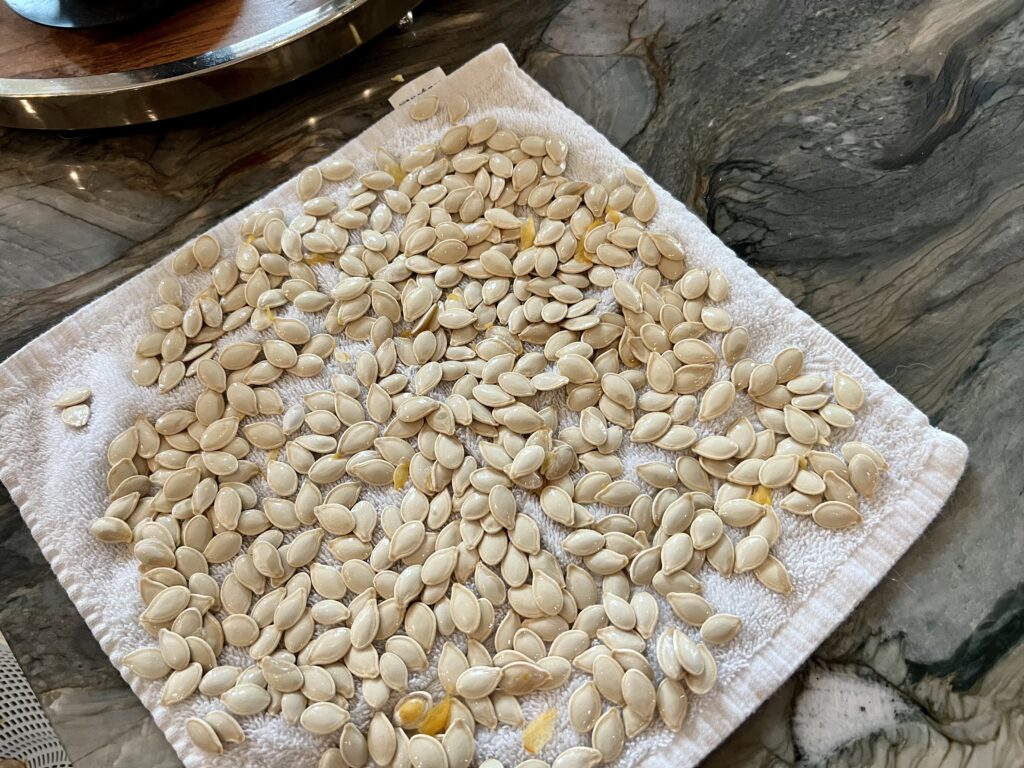
When your raw seeds are pretty well rinsed, lay them out on a towel and let them dry completely.
If you’re short on time, you can use an absorbent towel or a paper towel to soak up the excess water.

Now, it’s time for the secret sauce…
In other words, the seasoning mixture gives the seeds a savory and flavorful kick!
It’s actually pretty simple to make too. All you’ll need for one cup of seeds is a tablespoon of olive oil, 1/2 teaspoon salt, 1/4 teaspoon garlic powder, 1/4 teaspoon paprika and 1/8 teaspoon black pepper.
Oh… and if you like some spice, try adding a dash of cayenne pepper too!
(If you have 2 cups of seeds, double the recipe. 3 cups? triple it and so on!)

When your seasonings and olive oil are all combined, drizzle the mixture over the raw seeds and toss them around so they’re fully coated.
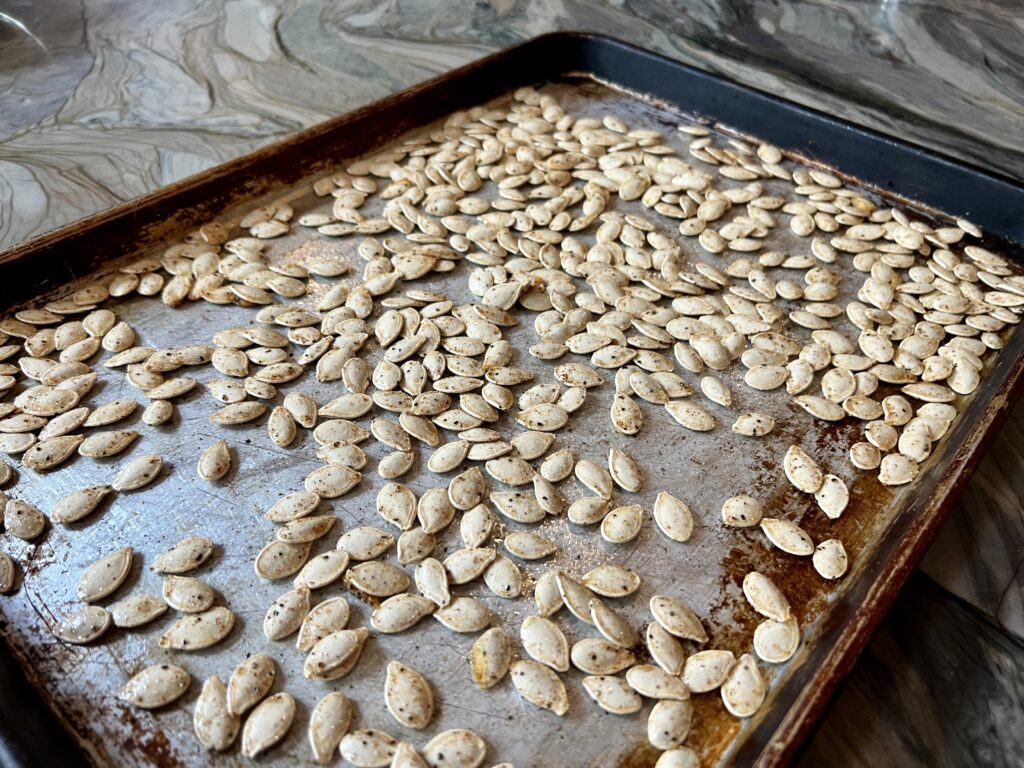
Follow this step by greasing a pan and spreading the seeds evenly over the pan.
*Pro tip! Give the pan a little back-and-forth shake and they’ll easily fall in line!
Roast your seeds for around 12-15 minutes at 350°F. To ensure the seeds get evenly toasted, try giving them a stir around the 7-minute mark.
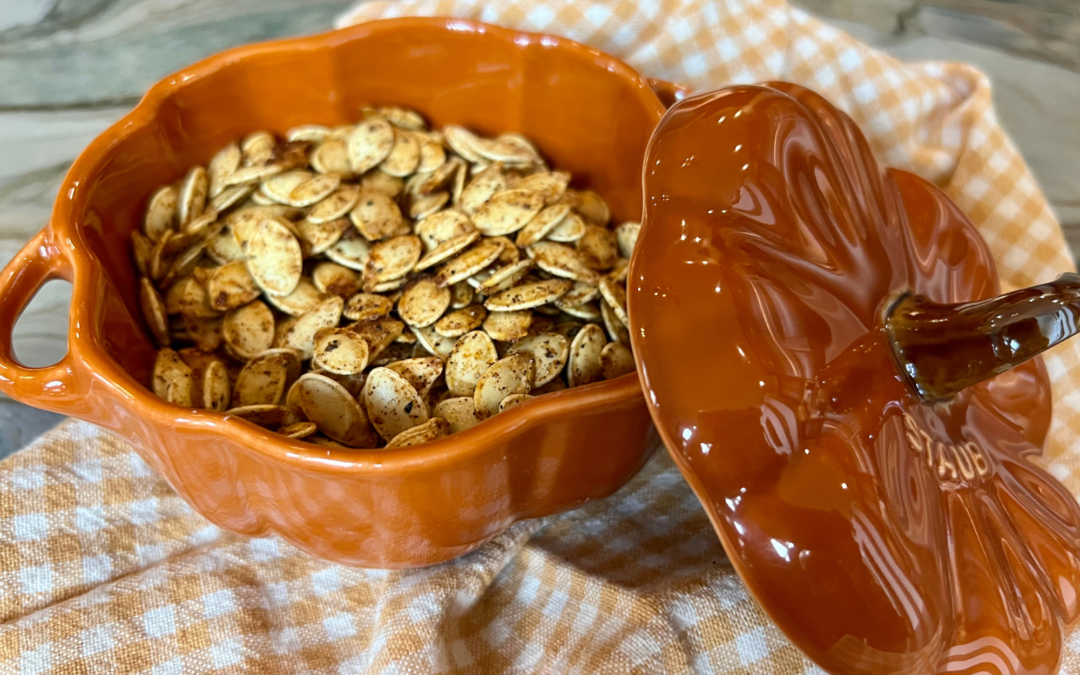
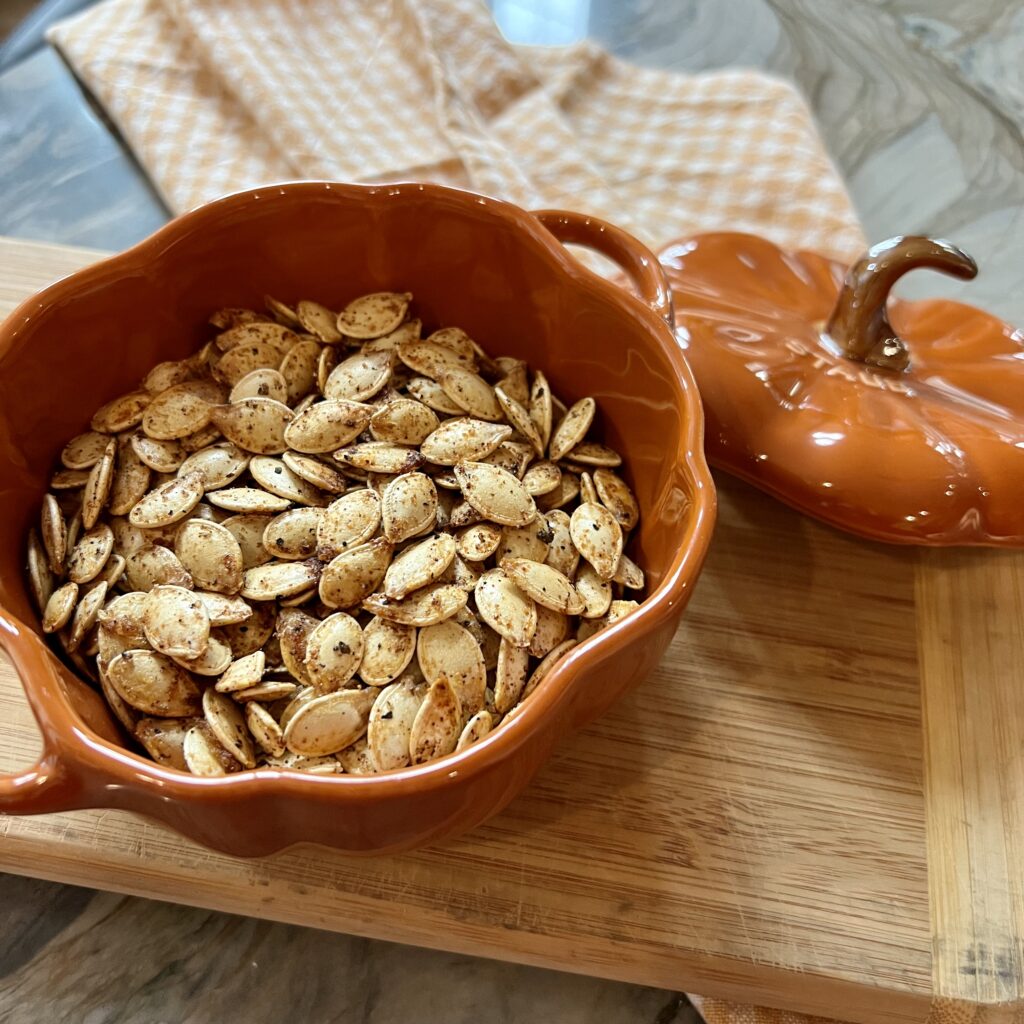
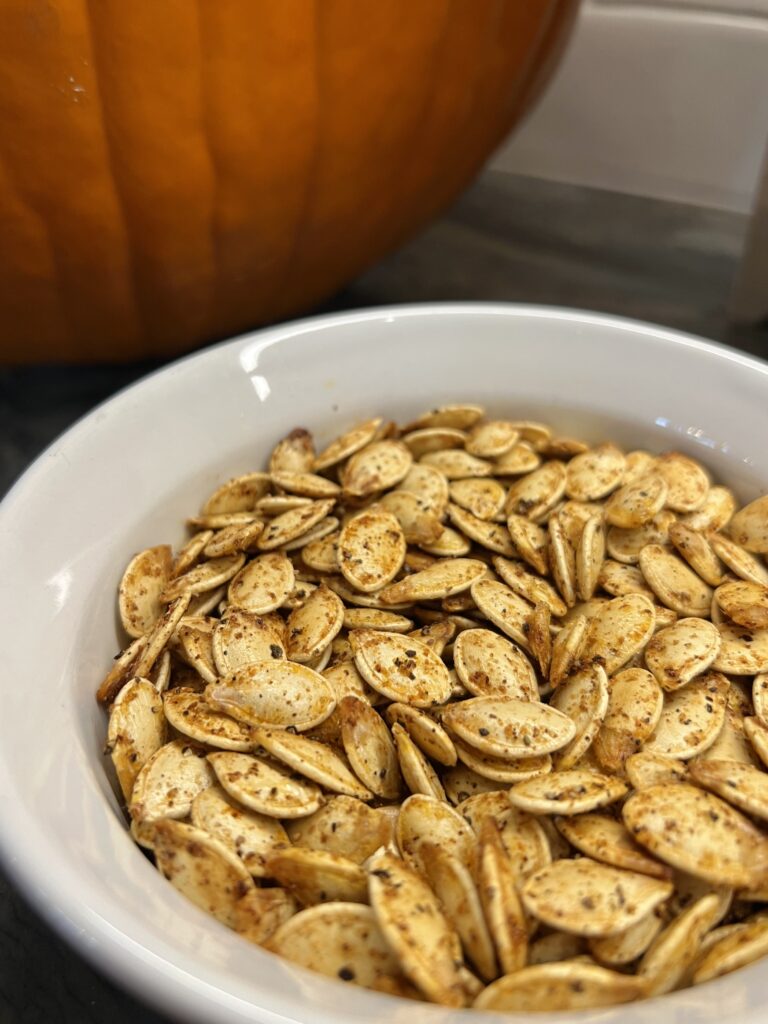
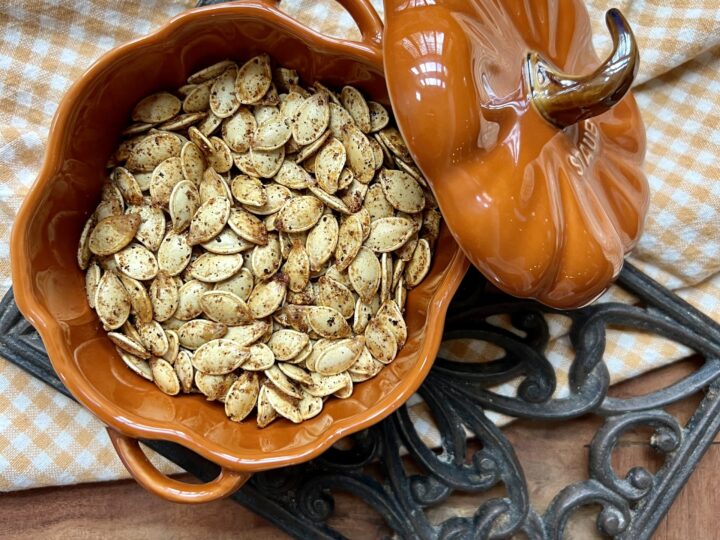
When they’re done, all you have to do is take them out, pour them in a bowl and let them cool!
So simple… but such a great fall snack!
Roasted Pumpkin Seeds Recipe
Need to gather your ingredients? Here’s the recipe that you can save or print!
Roasted Pumpkin Seeds
Savory and snack-friendly, these pumpkin seeds are a simple treat to eat throughout fall.
Ingredients
- 1 cup raw pumpkin seeds
- 1 tablespoon olive oil
- 1/2 teaspoon salt
- 1/4 teaspoon paprika
- 1/4 teaspoon garlic powder
- 1/8 teaspoon black pepper
Instructions
- Preheat oven to 350°F.
- Scoop your pumpkin seeds from your pumpkin and wash them in a colander. Try to remove as much pulp as possible.
- Lay your seeds out to try or pat dry thoroughly with a towel.
- Place your rinsed and dry seeds in a small bowl and set aside. In another small bowl, combine olive oil, garlic powder, paprika, salt and black pepper.
- Drizzle the seasoning mixture over your seeds, and coat the seeds completely.
- Lightly grease a sheet pan with cooking spray and spread your seasoned seeds evenly on the pan.
- Bake the seeds for a total of 12-15 minutes, tossing them / stirring them halfway through.
- Take your seeds out of the oven and transfer them to a bowl to cool.
Notes
If you like your seeds with a spicy kick, add a small amount of cayenne pepper to your seasoning mixture.
Thanks for taking a look at this new recipe! Half of the joy of making pumpkin seeds is getting to do it with a group of friends or with family.
A great way to connect when life gets a little hectic!
From my kitchen to yours,
Jill
Did you know I have my own online shop? Check it out HERE!