When National Doughnut Day rolls around, I typically treat myself to a donut at a nearby bakery. But this year, I decided to try my shot at making them in my own kitchen.
Related: Banana and Peanut Butter Breakfast Cookies
I’ll say… the thought of making donuts seemed a little intimidating. They’re so easy to buy in the store anyway, and making them from scratch just sounds time-consuming.
But boy, was I wrong.
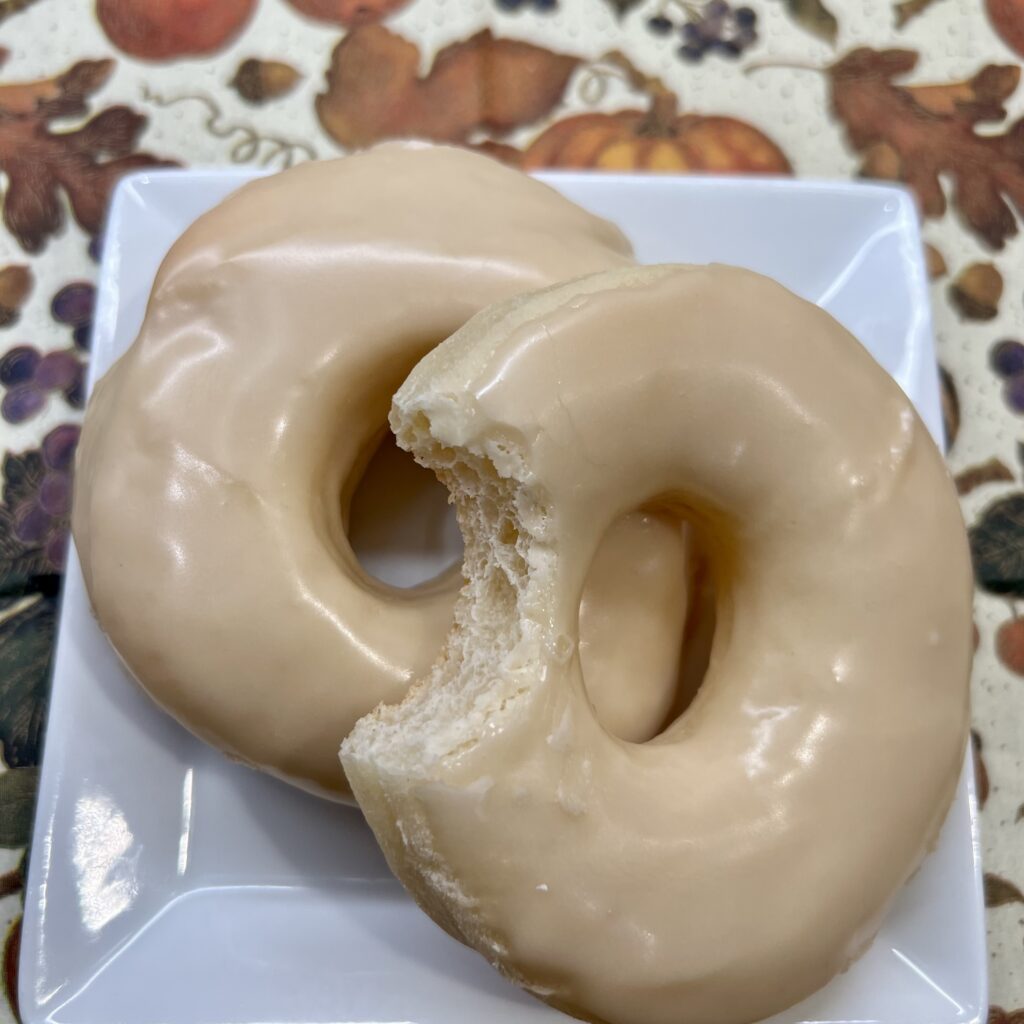
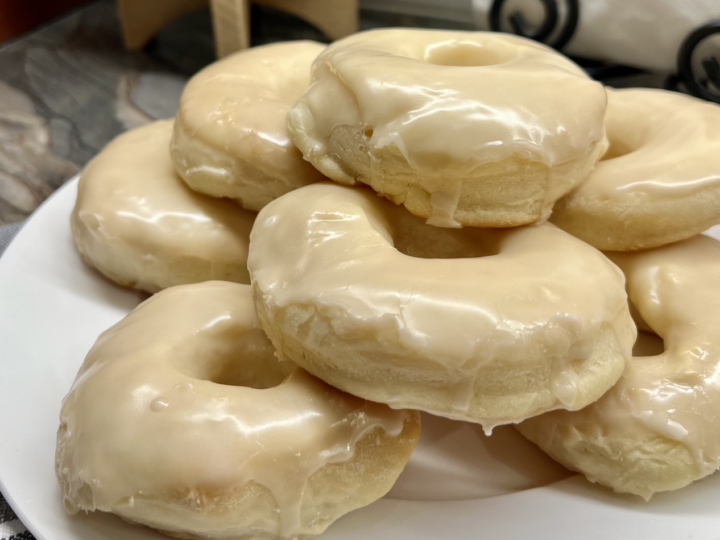
The recipe is super simple to follow and they came out tasting better than the store-bought versions I snag while I’m on my way to the produce section.
One of the primary reasons these are easy to make is because they’re baked instead of fried. It also means they’re lower in calories and fat than your traditional donuts!
Related: 2 Ingredient Dough for Bagels and More
Plus, this recipe makes the softest and fluffiest base that you can change up depending on the occasion.
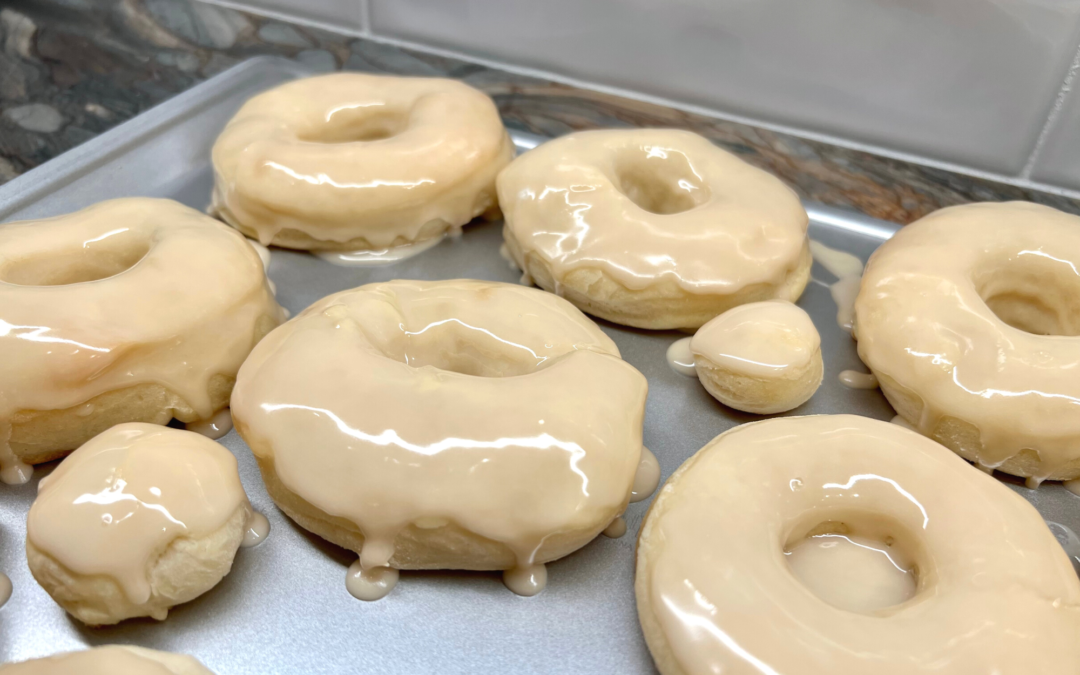
I topped my donuts with a simple glaze. But you can frost them with buttercream, dip them in cinnamon sugar, or shower them with sprinkles if you want a pop of color!
Do I have your attention yet?
How to Make Fluffy Baked Donuts
Before starting, make sure you have all of your ingredients on hand as the timing of adding each ingredient is important.
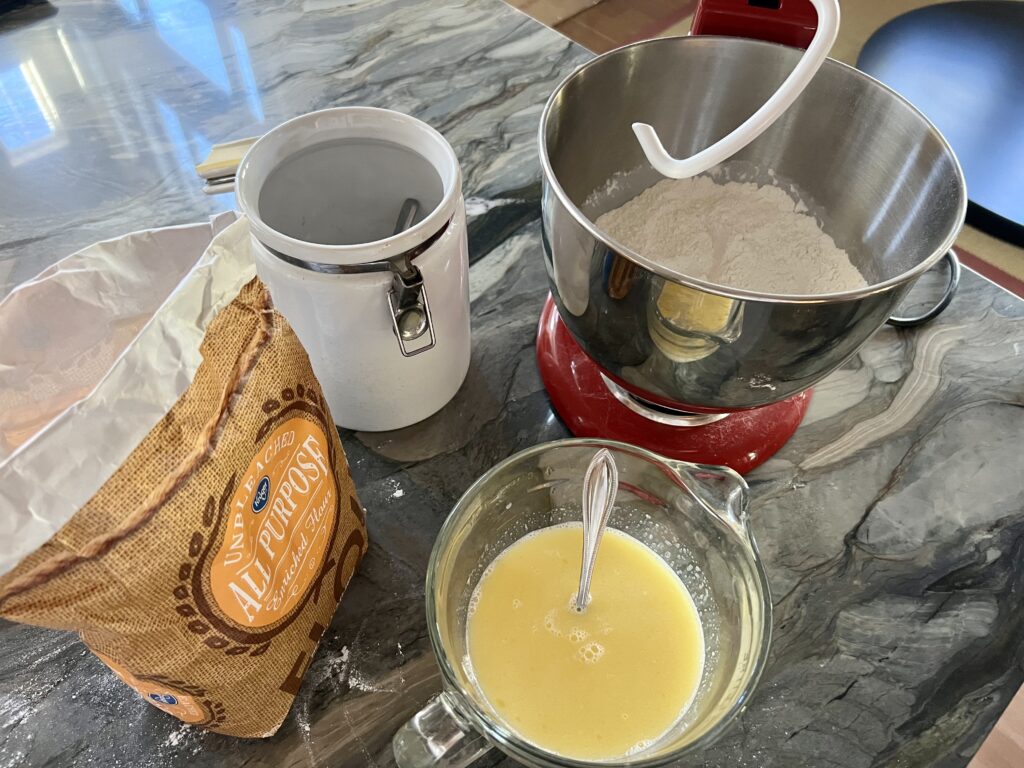
I was surprised to see I had almost all of the ingredients I needed.
All I had to buy from the store was active dry yeast. The flour, sugar, salt, butter, milk and vanilla extract were already in my kitchen!
Because you’ll have to mix the ingredients for a few minutes at a time, using a stand mixer is best.
I always turn to my KitchenAid. You’ll also need a dough hook, so no matter which stand mixer you use, ensure the hook is on hand!
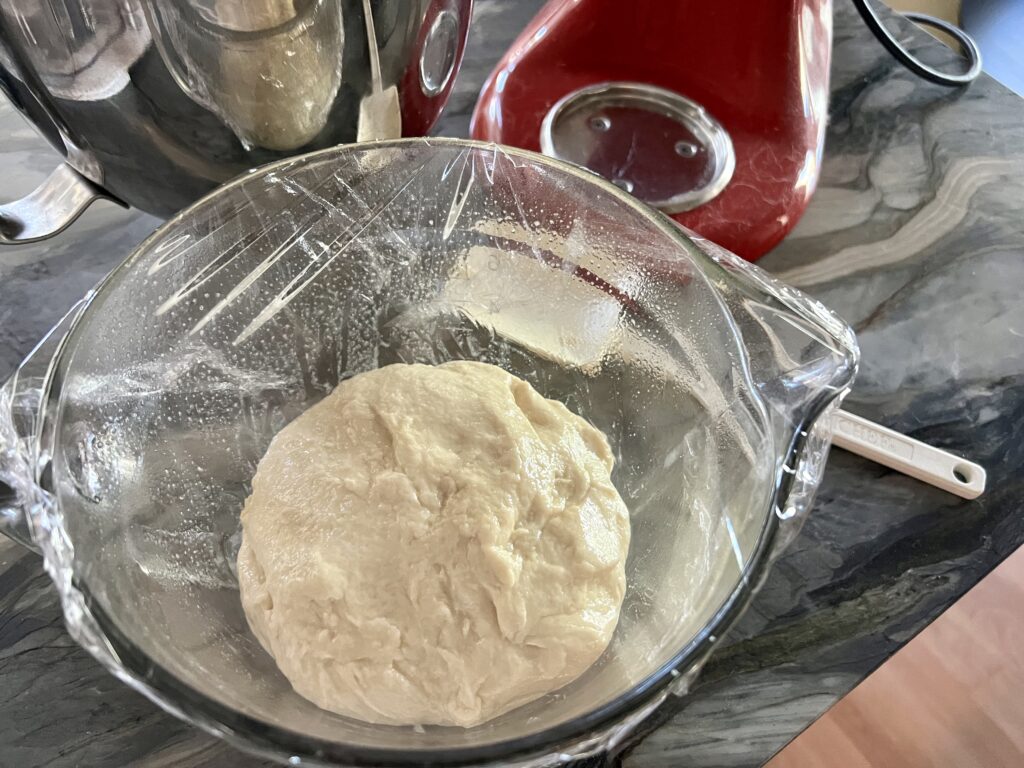
After all of the ingredients are combined, coat a large bowl in oil and dump your dough in the bowl. Flip it around a bit too—the entire dough ball should be coated in oil.
Now’s the hard part… waiting!
Cover the bowl tightly and allow the dough to double in size. This took around an hour and a half for me.

When the dough finishes rising, plop it on a flour-coated surface.
Then, roll it out to about 1/2-inch thick and use a round cutter to cut out the donut shapes.
You can do this with a round cookie cutter and a smaller round cutter, but I found this donut cutter on Amazon and it worked SO well!
Follow by placing your donuts on a greased cookie sheet and letting them rise (covered) for about 20 minutes while your oven is heating to 350º F.
Brush the tops with butter and pop them in the oven for about 12 minutes.
When you take them out, you’ll have fluffy donuts that are almost ready to eat! Just let them cool on a cooling rack before taking a taste.
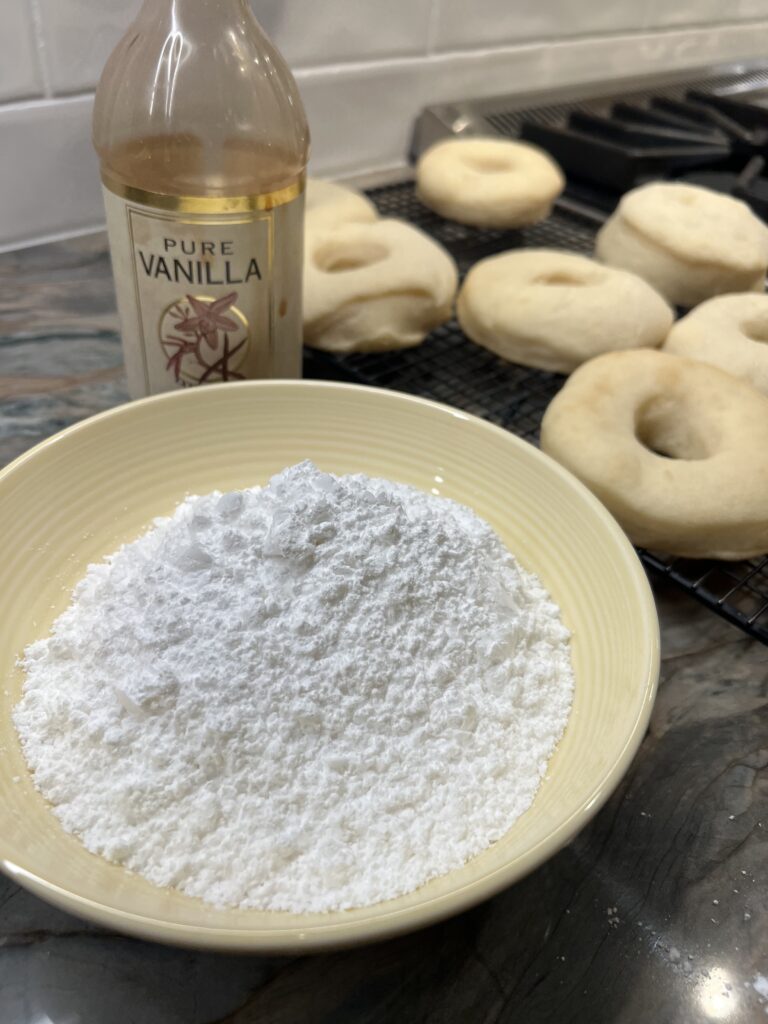
Now is the time when you can decide how you want to dress your donuts.
As mentioned, I just made a simple glaze with powdered sugar, water and vanilla extract.
I also added a dash of maple extract because it’s fall, after all!
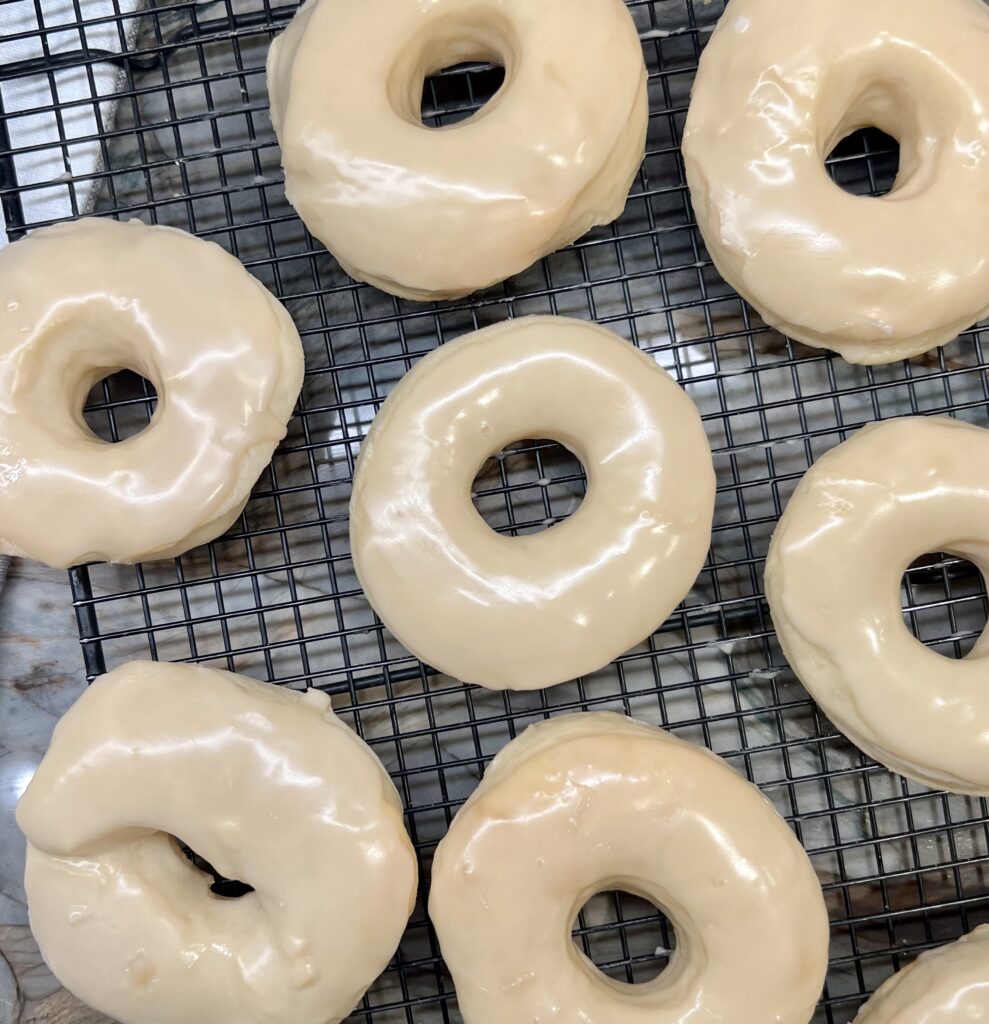
They look pretty good, huh? Well, they taste even better!
I added the recipe with specific measurements and instructions below. I can’t wait for you to make them!
Fluffy Baked Donuts
Ingredients
Donut Dough
- 3 1/4 cups all-purpose flour
- 1/4 cup white granulated sugar
- 2 teaspoons salt
- 2 1/4 teaspoons active dry yeast (typically 1 packet)
- 4 tablespoons butter
- 1/3 cup water
- 1 cup milk
- 1 tablespoon vanilla extract
Glaze
- 2 cups powdered sugar
- 3-4 tablespoons of water
- 2 teaspoons vanilla extract
Instructions
For the Dough:
- In a stand mixer fitted with a dough hook, mix together the flour, sugar, salt and yeast.
- In another bowl, heat together the water, milk and melted butter until lukewarm. Then, add the vanilla extract and stir.
- Turn the machine on low and slowly add the mixture of wet ingredients. Stir on low for about 2 minutes. Run a spatula under the dough to make sure everything is well-mixed.
- Increase the speed of the mixer to medium and let it run for about 7 minutes. The dough should be semi-sticky and saggy.
- Coat another mixing bowl or glass bowl in oil and place the dough ball in the bowl. Flip/turn it carefully to coat the ball in oil.
- Cover the bowl tightly in plastic wrap and let the dough rise until its' double in size. This should take anywhere from 90 minutes to 2 hours.
- After letting it rise, flip the dough onto a floured work surface and roll it out to 1/2-inch thick.
- Using your desired cutter (I prefer a donut cutter you can buy online), cut out the donuts from your sheet of dough.
- Place your donuts on a greased cookie sheet and cover them with plastic wrap for about 20 minutes.
- Heat your oven to 350ºF.
- Unwrap your donuts after 20 minutes and brush the tops of the donuts with melted butter.
- Bake your dough for 12-14 minutes. They might look underdone, but they should be good! If you over-bake them, they'll turn out dry.
- Remove the donuts from the oven and let cool on a cooling rack.
For the Glaze:
- In a bowl big enough for dipping, add powdered sugar, water and vanilla extract. Whisk with a spoon until combined.
- If you'd like your glaze to be a bit more runny, feel free to add more water.
- When the glaze is well-mixed, dip your donuts top-down into the glaze, ensuring you dip them approximately halfway into the glaze.
- Let some of the glaze drop off the donuts while they're still upside down, then place them right side up back on the cooling rack or cookie sheet.
Notes
If you'd like, you can save the center of the dough cut-outs to make donut holes! A little treat if you need to curb that sweet craving!
These fluffy baked donuts are best when enjoyed the day you make them. But they can certainly be enjoyed a couple of days later too.
If storing them, it’s best to keep them covered in a cool dry place. But don’t put them in the fridge! Any unwanted moisture (even a little) can ruin the glaze.
So, the next time someone requests donuts at a birthday party, book club or as a classroom treat, surprise them by making them at home!
From my kitchen to yours,
Jill
Did you know I have my own online shop? Check it out HERE!