I don’t know about you, but I grew up with those dye kits for Easter Eggs that always left a little “to be desired” in terms of design and color.
But I ran across a cool way (kind of a pun… you’ll see) to dye your eggs that’s easy for kids. It also produces an awesome tie-dye effect!
Interested in creating these Easter Eggs this season? Check out my step-by-step below!
First Step to Beautiful Easter Eggs…
Start with hard-boiled eggs. I’m a huge fan of making mine in my Mealthy, but you can make them whatever way you typically make hard-boiled eggs.
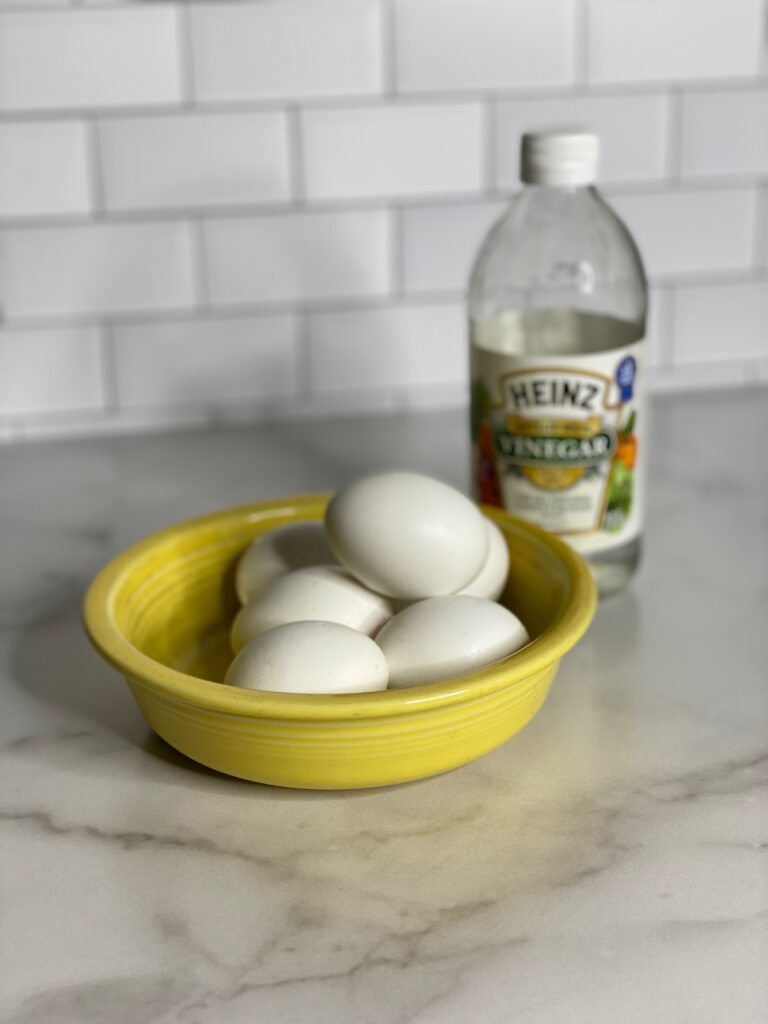
After you’ve cooked your eggs, let them cool. Also, just before you start this DIY, soak your eggs in distilled white vinegar for 2 minutes. This will help the dye adhere and look more vibrant on your eggs.
Don’t rinse the vinegar off when the two minutes are up! Just place them on a paper towel and gently blot.
The Really “Cool” Part!
Take a rimmed cookie sheet and spread a layer of whipped topping (Cool Whip!).
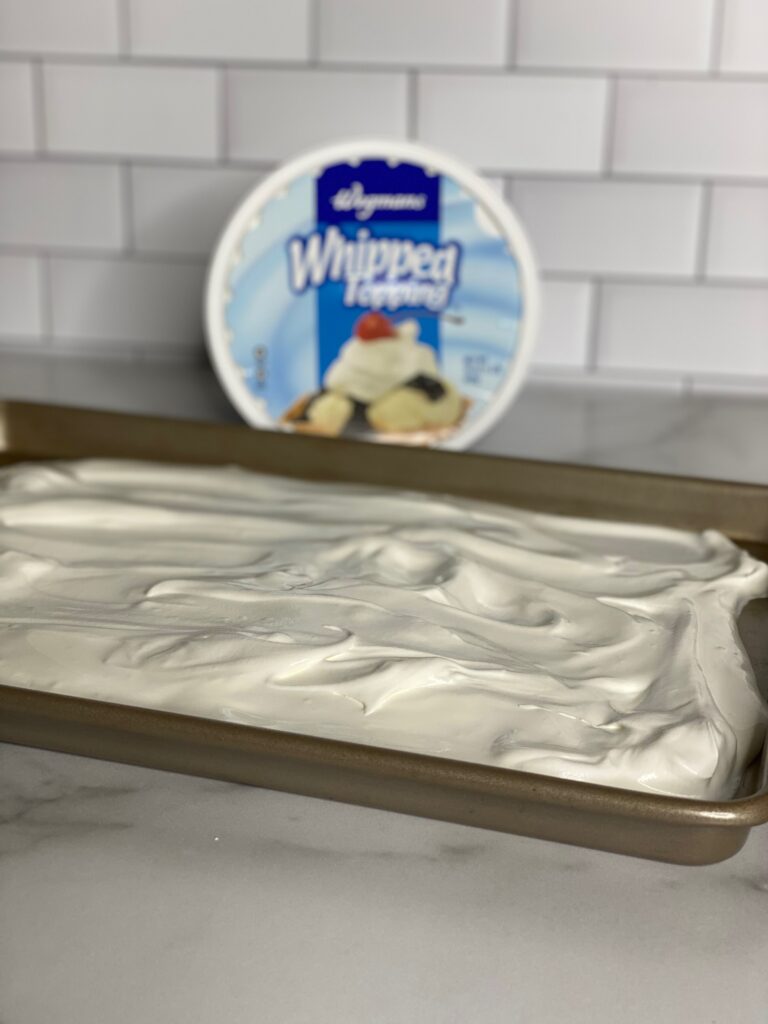
It should be about 1/2 inch thick.
Add Food Coloring…
I used the NEON food coloring but the options for the colors are endless. Just make sure you’re using food coloring, not gel coloring.
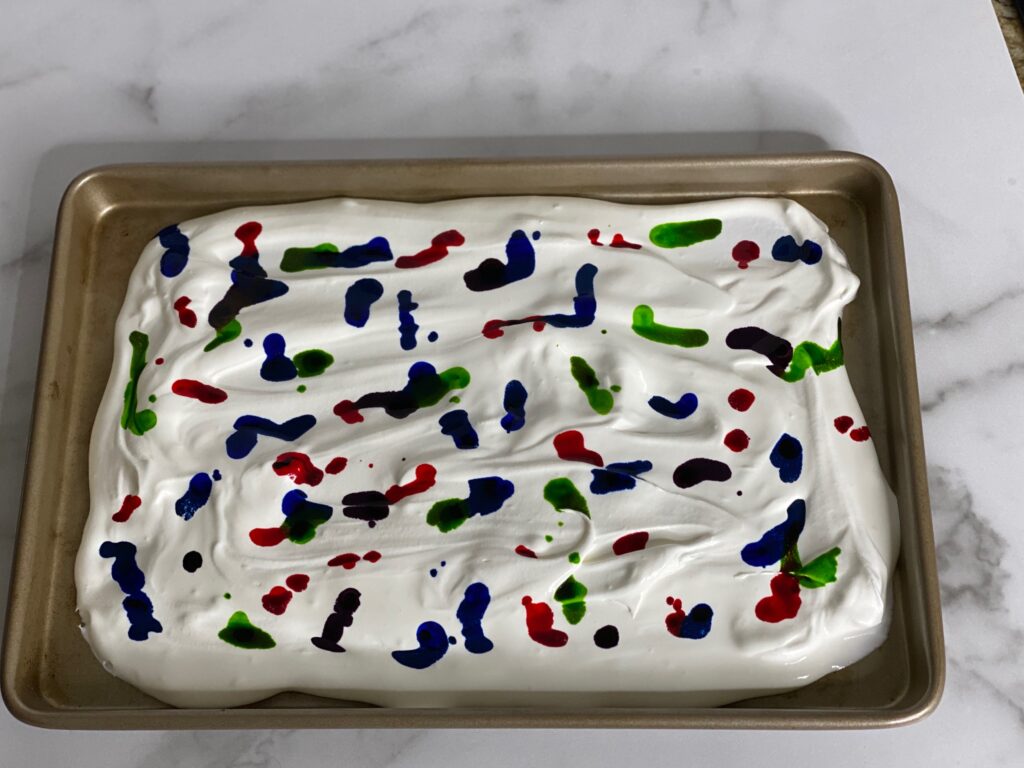
You’ll find true food coloring dye in the spice section. It’s different than most of the colorings you see with frostings and cake decorations and it does make a difference in the color payoff.
Related: Cute Critters to Add to Your Spring Home
Keep in mind that some colors are more dominant than others, so use fewer drops of those. I found that I needed fewer drops of blue, but more lime green to get a good look. If I had used too much blue, it would have drowned out the other colors.
Start to Swirl!
Take a knife or a kebob stick and swirl through all of the coloring drops. The more you swirl through, the better your eggs will look!
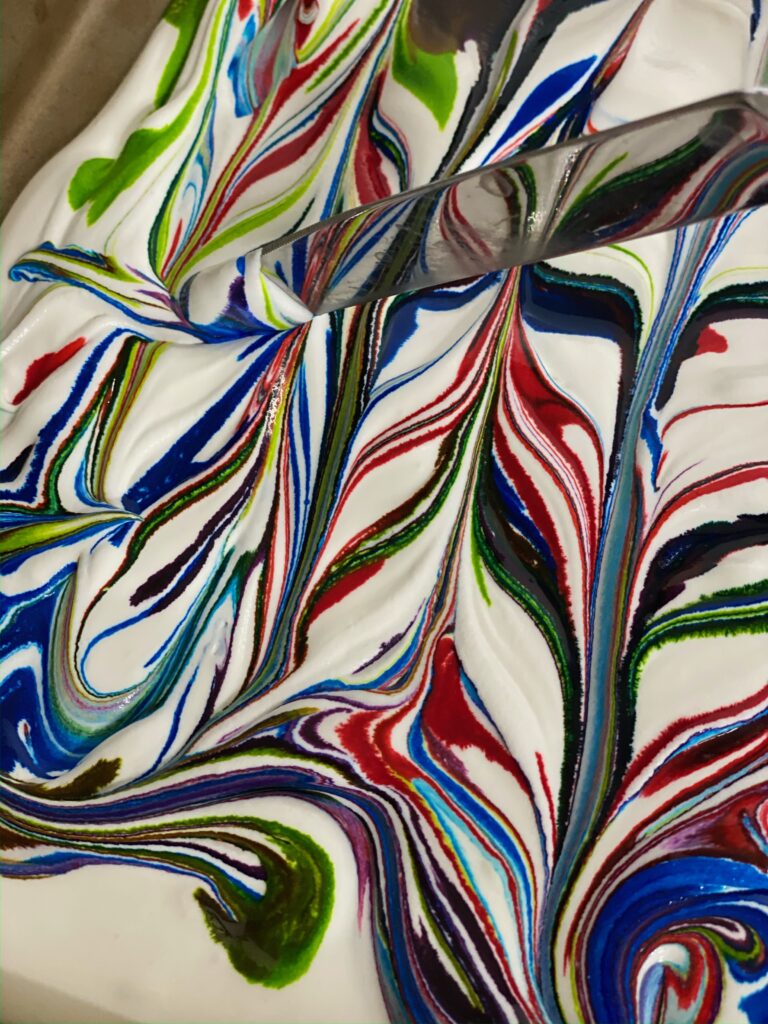
Don’t leave too many large, white areas (where coloring wasn’t pulled through). White, undyed spots on the Easter Eggs really stand out.
Rollin’ Rollin’ Rollin’
Roll your eggs through your tie-dye swirls. And don’t forget to cover the ends of the eggs.
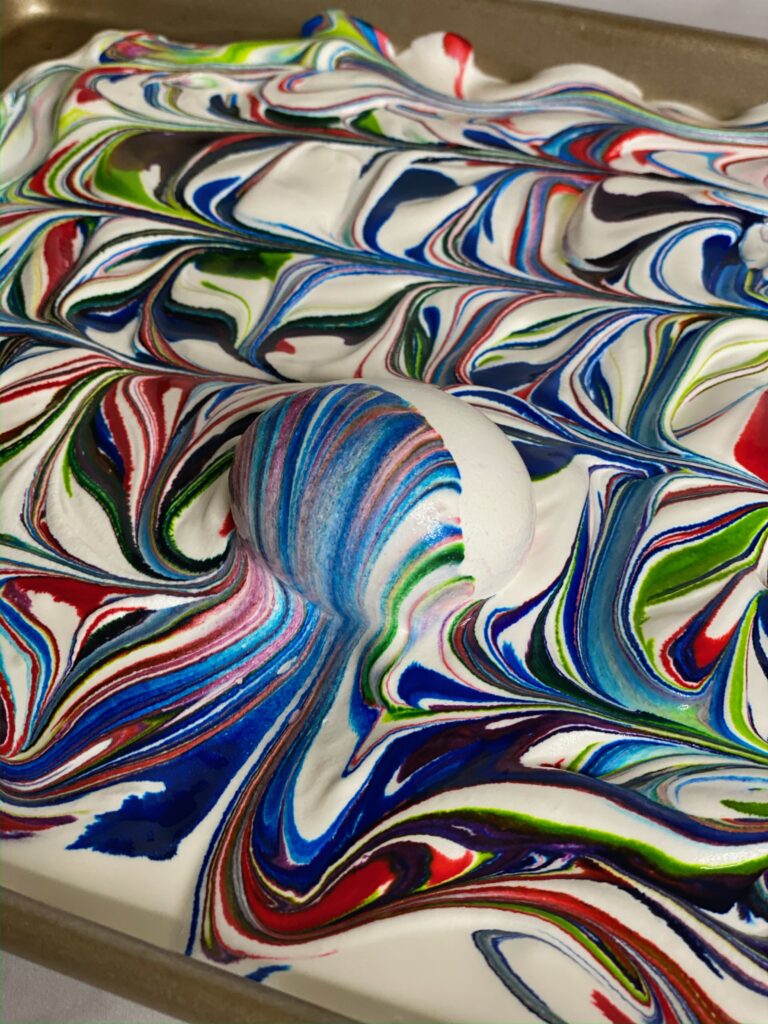
Once you’ve rolled a full coverage of the egg, LEAVE IT ON THE COOKIE SHEET.
Start your next egg in a different area and repeat directions. Once all of your eggs have been rolled, leave them to sit on the cookie sheet for about 15 minutes.
*TIP: If you’re worried about the food coloring staining your hands, wear gloves!
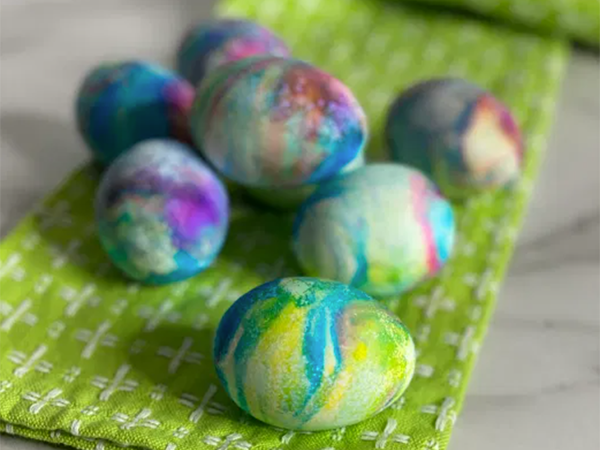
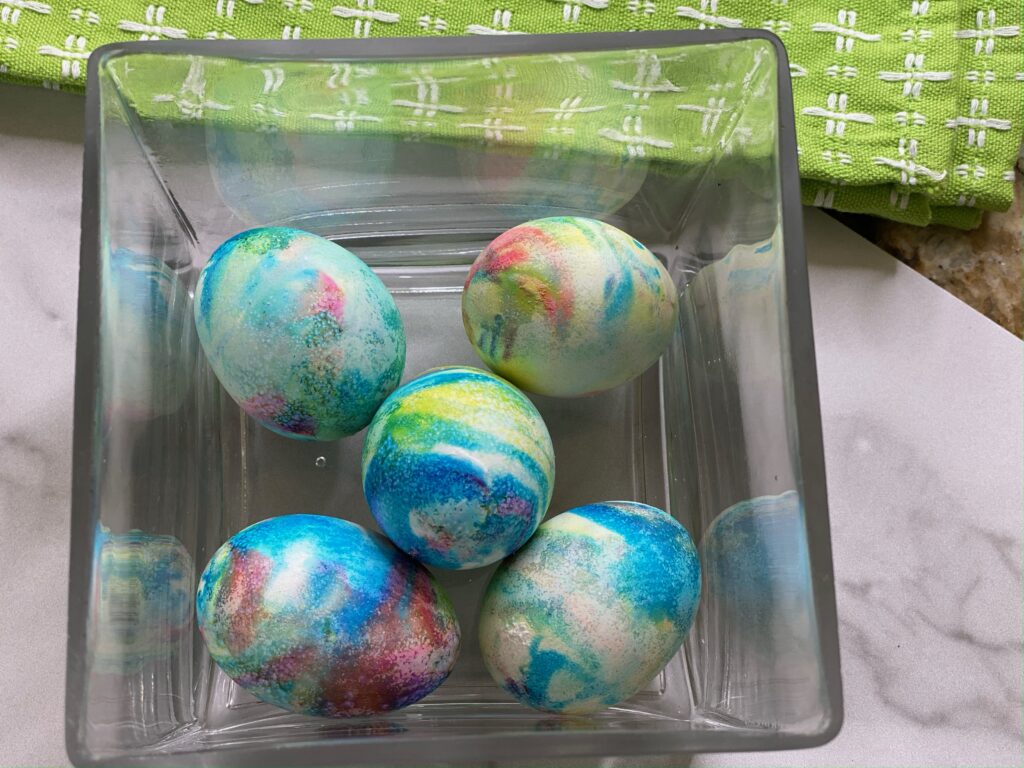
Abracadabra! The Easter Eggs are EGG-cellent!
Lightly rinse off the whipped topping, and your tie-dye Easter egg will be revealed!
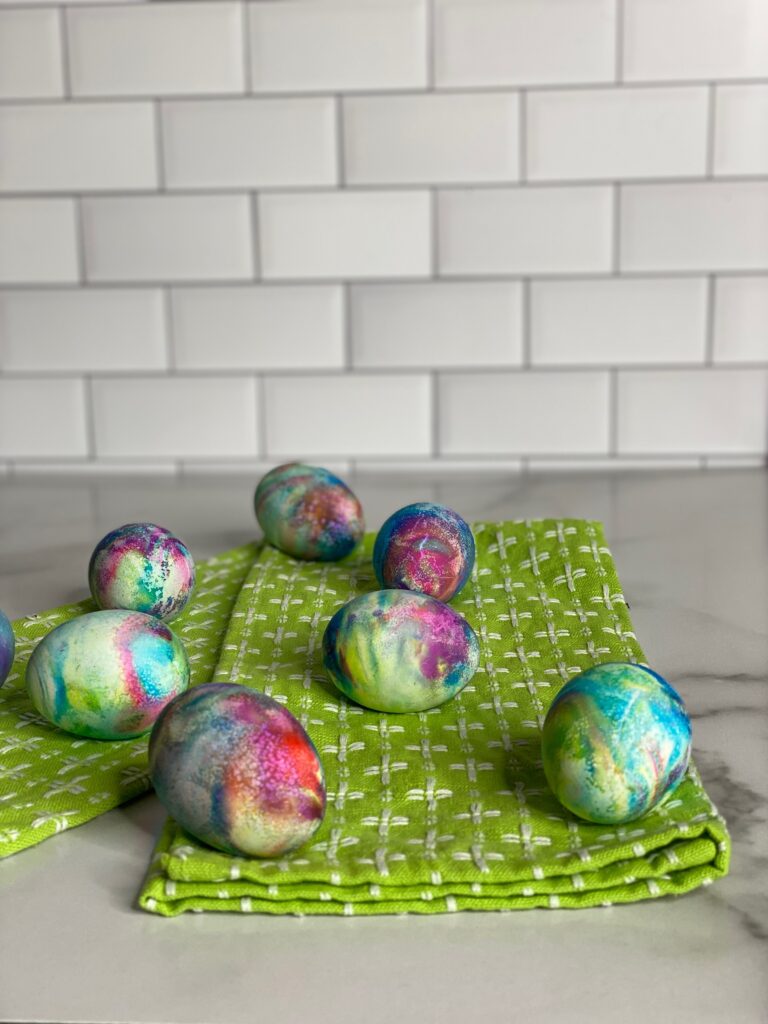
If you find that you have a bare spot, just smear a little of the dyed cool whip from your cookie sheet on that spot on the egg and let sit for another 5 minutes.
No one will know!
Another Fun Egg Dying Hack
Grab a bag of dry rice and let’s get to it! Here’s another easy way to create a neat tie-dye effect on eggs. Similar to the whipped cream tie-dye eggs, you’ll start off with hard-boiled eggs.
Next, add about a cup of rice into a Ziploc bag and put 7-10 drops of food coloring into the same bag on top of the rice.
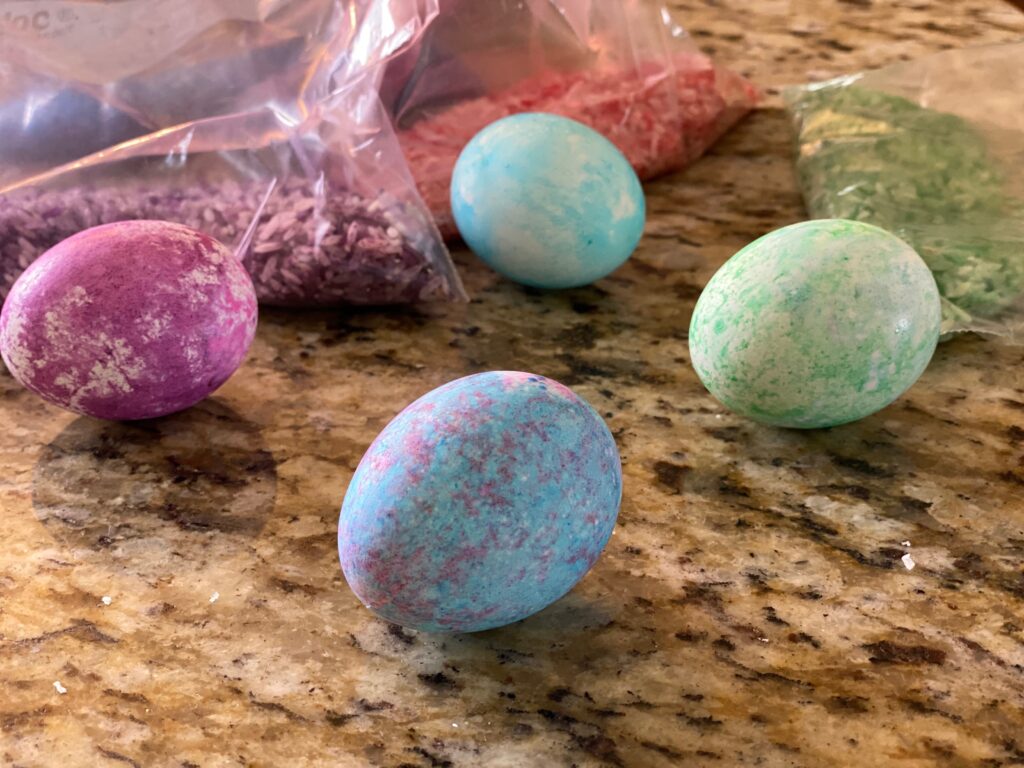
Stir the rice and food coloring with a spoon, then place the egg inside, seal the top, and get to shaking! Another cool look that’s super simple!
These are so much fun to make, they take very little time and look so pretty. I’m almost certain that the Easter Bunny is going to LOVE hiding these for your kiddos!
Related: DIY Spring Burlap Decor
I have to admit, while it’s a fun DIY for kids, it was therapeutic and relaxing for me too. I hope you enjoy giving these a try. I’d love to see your after pictures, so post them in the comments so I can see how they turn out!
From my home to yours,
Jill
Did you know I have my own online shop? Check it out HERE!

WHAT AN EGG-SELENT IDEA❣️❣️ WILL HAVE TO TRY THIS….????
These are gorgeous!
Love this idea for my grand kids……and ME!
I might have to make these. Tie Dye is my favorite color.
Hi Jill, made the Easter eggs, best ever. No more store coloring for me!!!
I’m so glad you tried them!!